Part locator

Part locator

Part locator

First Cut Prep: How Hay Conditions Impact Roller Settings (Spring 2026 Guide)

First Cut Prep: How Hay Conditions Impact Roller Settings (Spring 2026 Guide)

April 26, 2026

LEARN MORE

First cut can make or break your entire hay season, and most problems start with roller settings that don’t match real field conditions. When your hay conditioning rollers aren’t properly adjusted for moisture, crop type, or field conditions, you slow down drying, lose nutrients, and increase your risk of weather damage. Getting your setup right from the start means faster curing, better forage quality, and fewer headaches when it’s time to bale.

At B&D Rollers, we’ve worked with operations across a wide range of crops, conditions, and equipment setups, and one thing is consistent: no two spring cuts are the same. Moisture levels, crop density, and field conditions shift constantly, and your roller settings need to adjust with them. If your rollers aren’t properly set or if they’re worn, you’re sacrificing efficiency and forage quality every pass.

What Are Hay Conditioning Rollers and Why They Matter

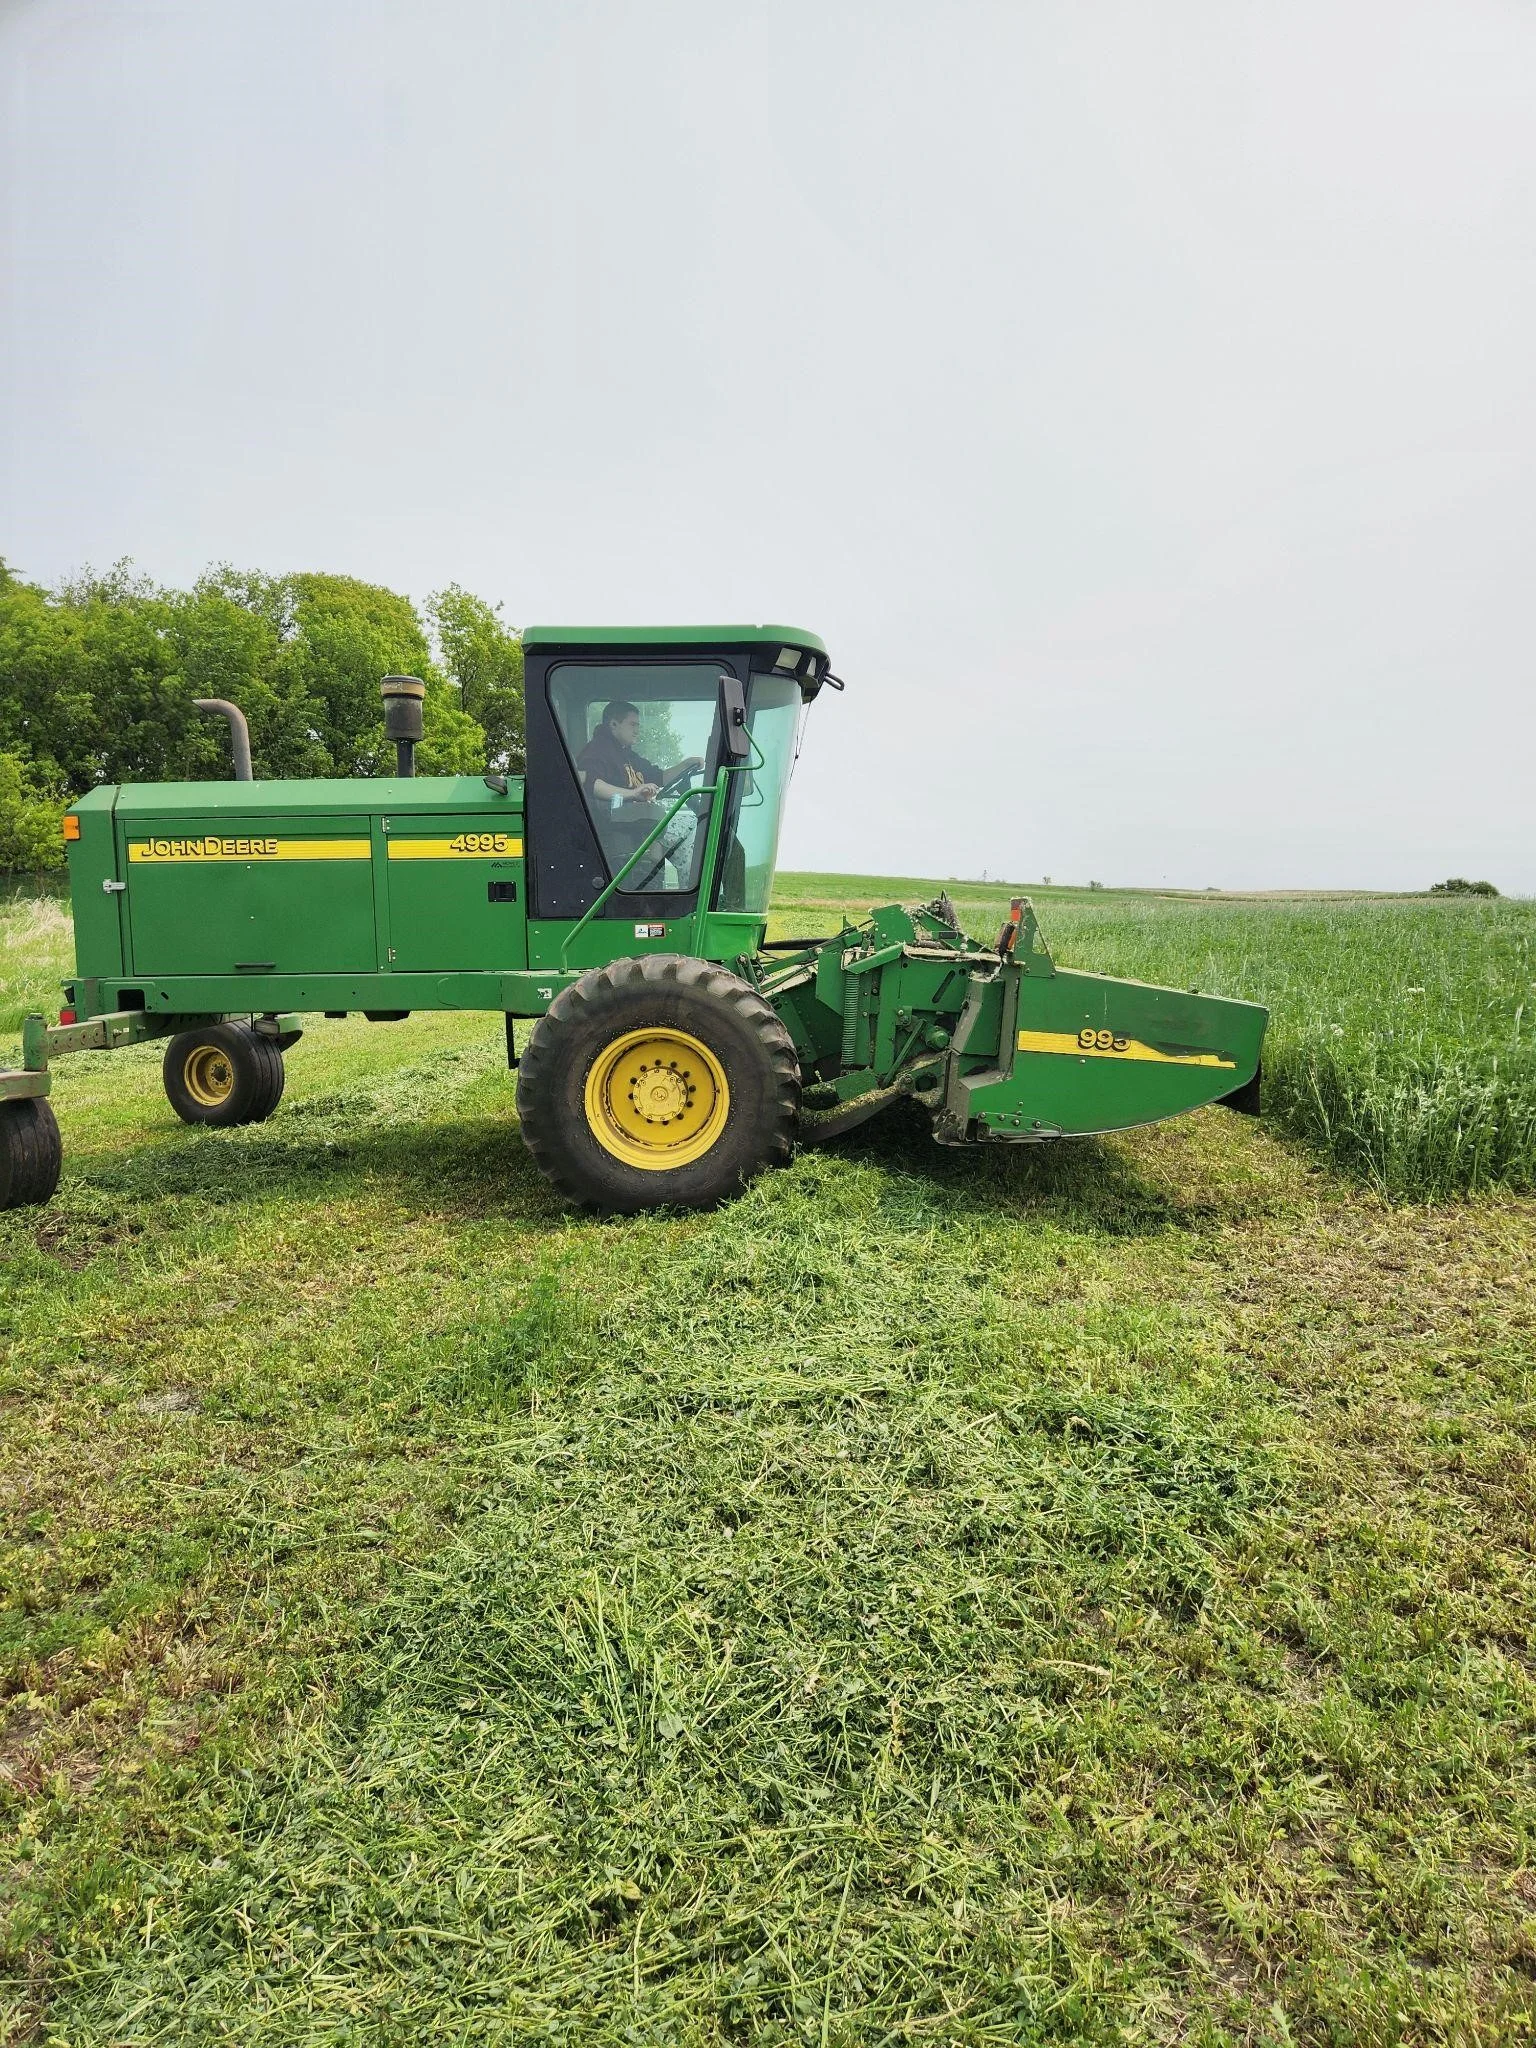
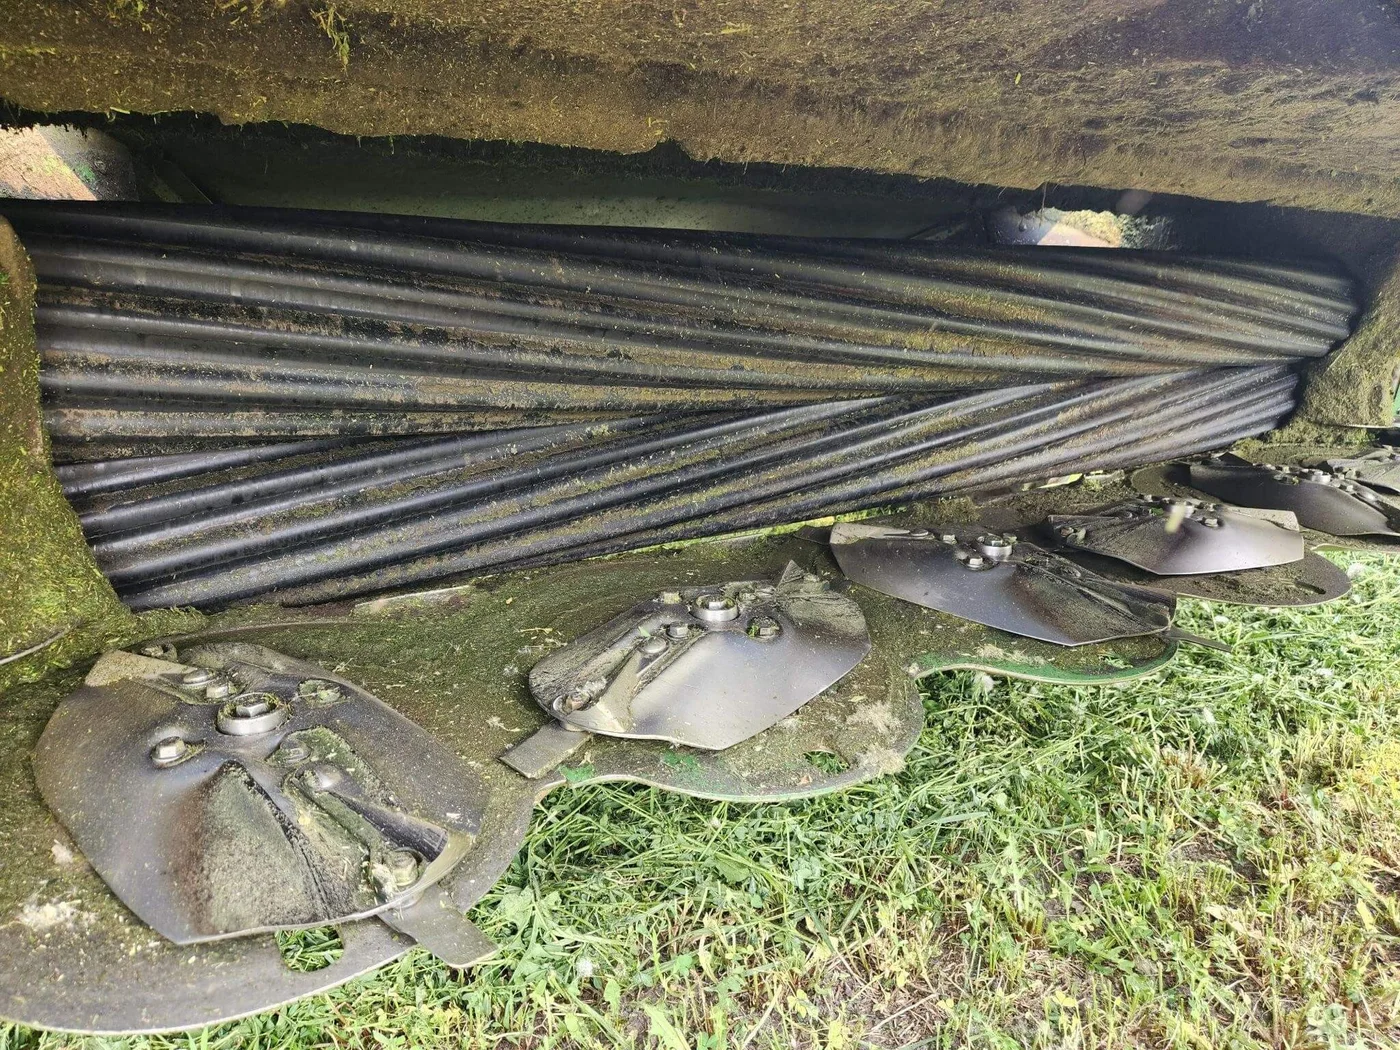
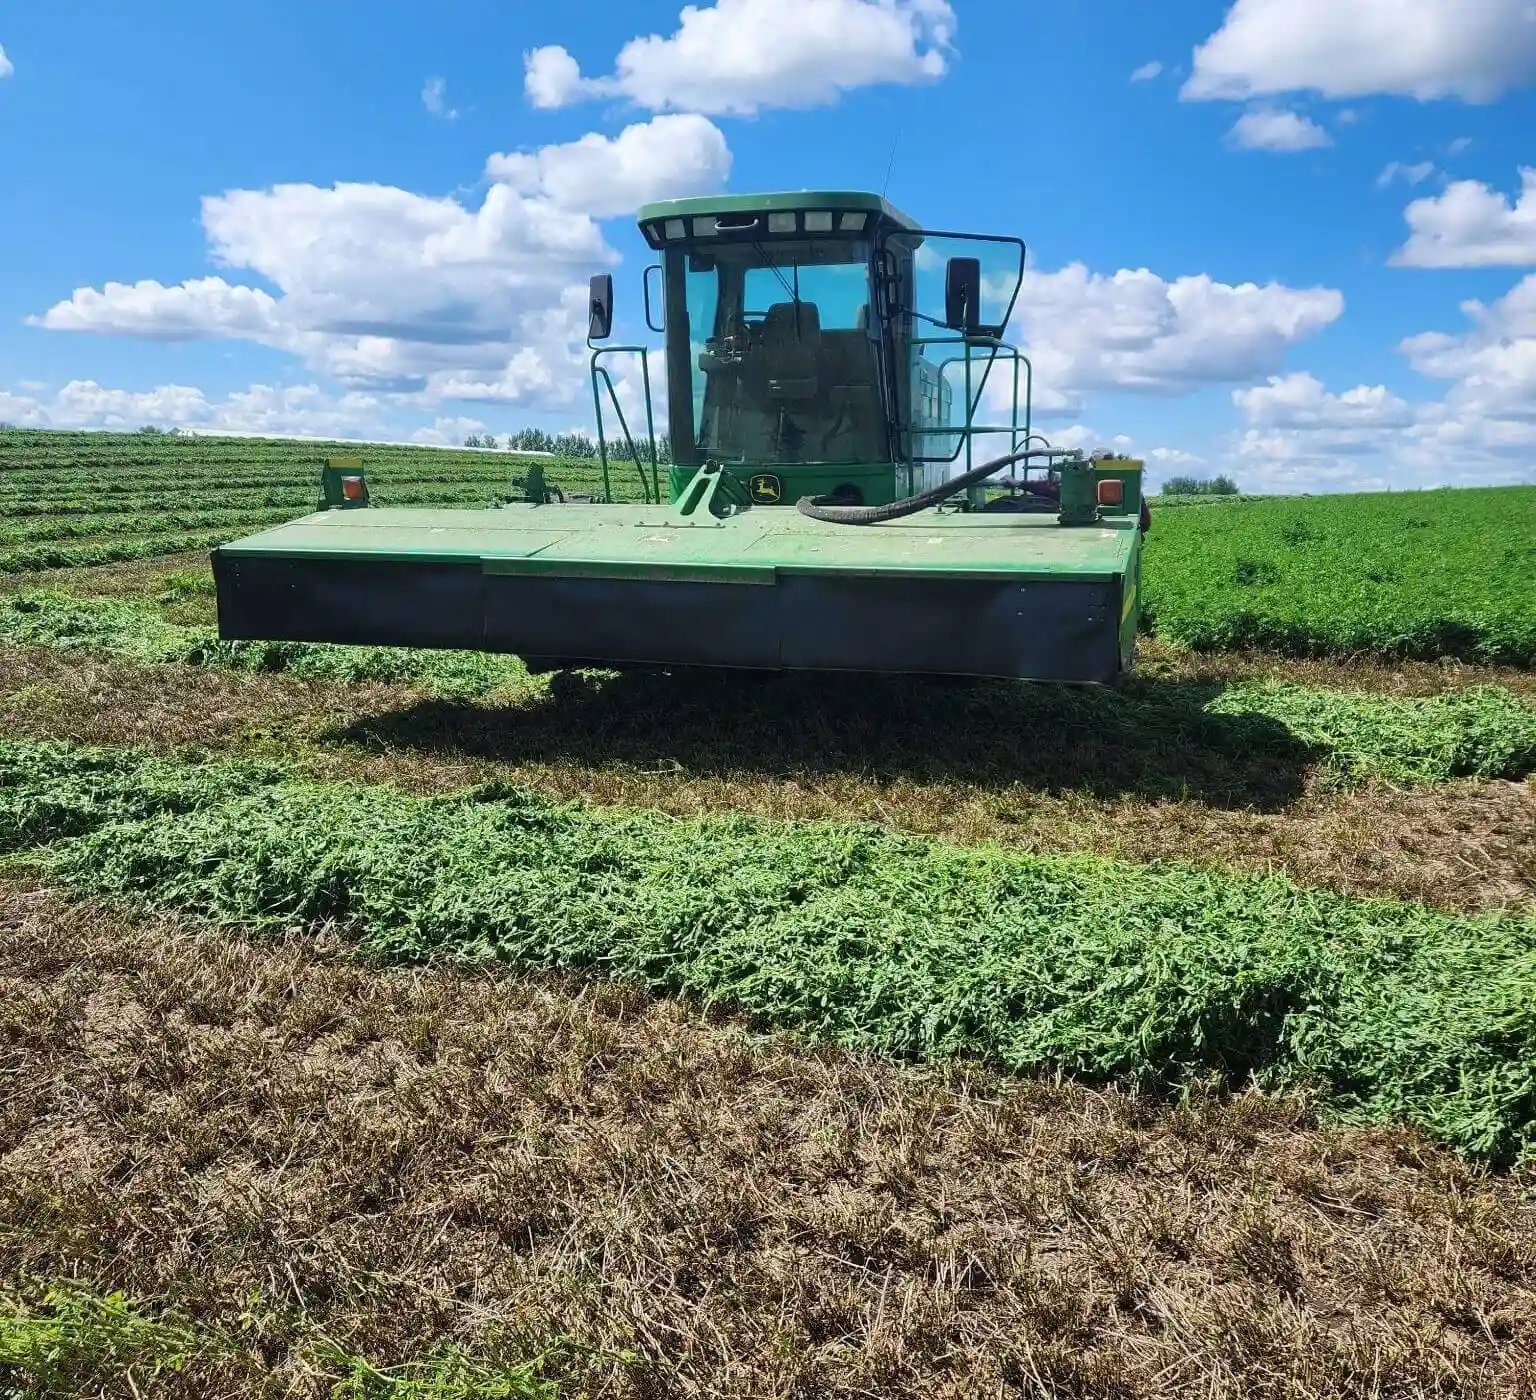
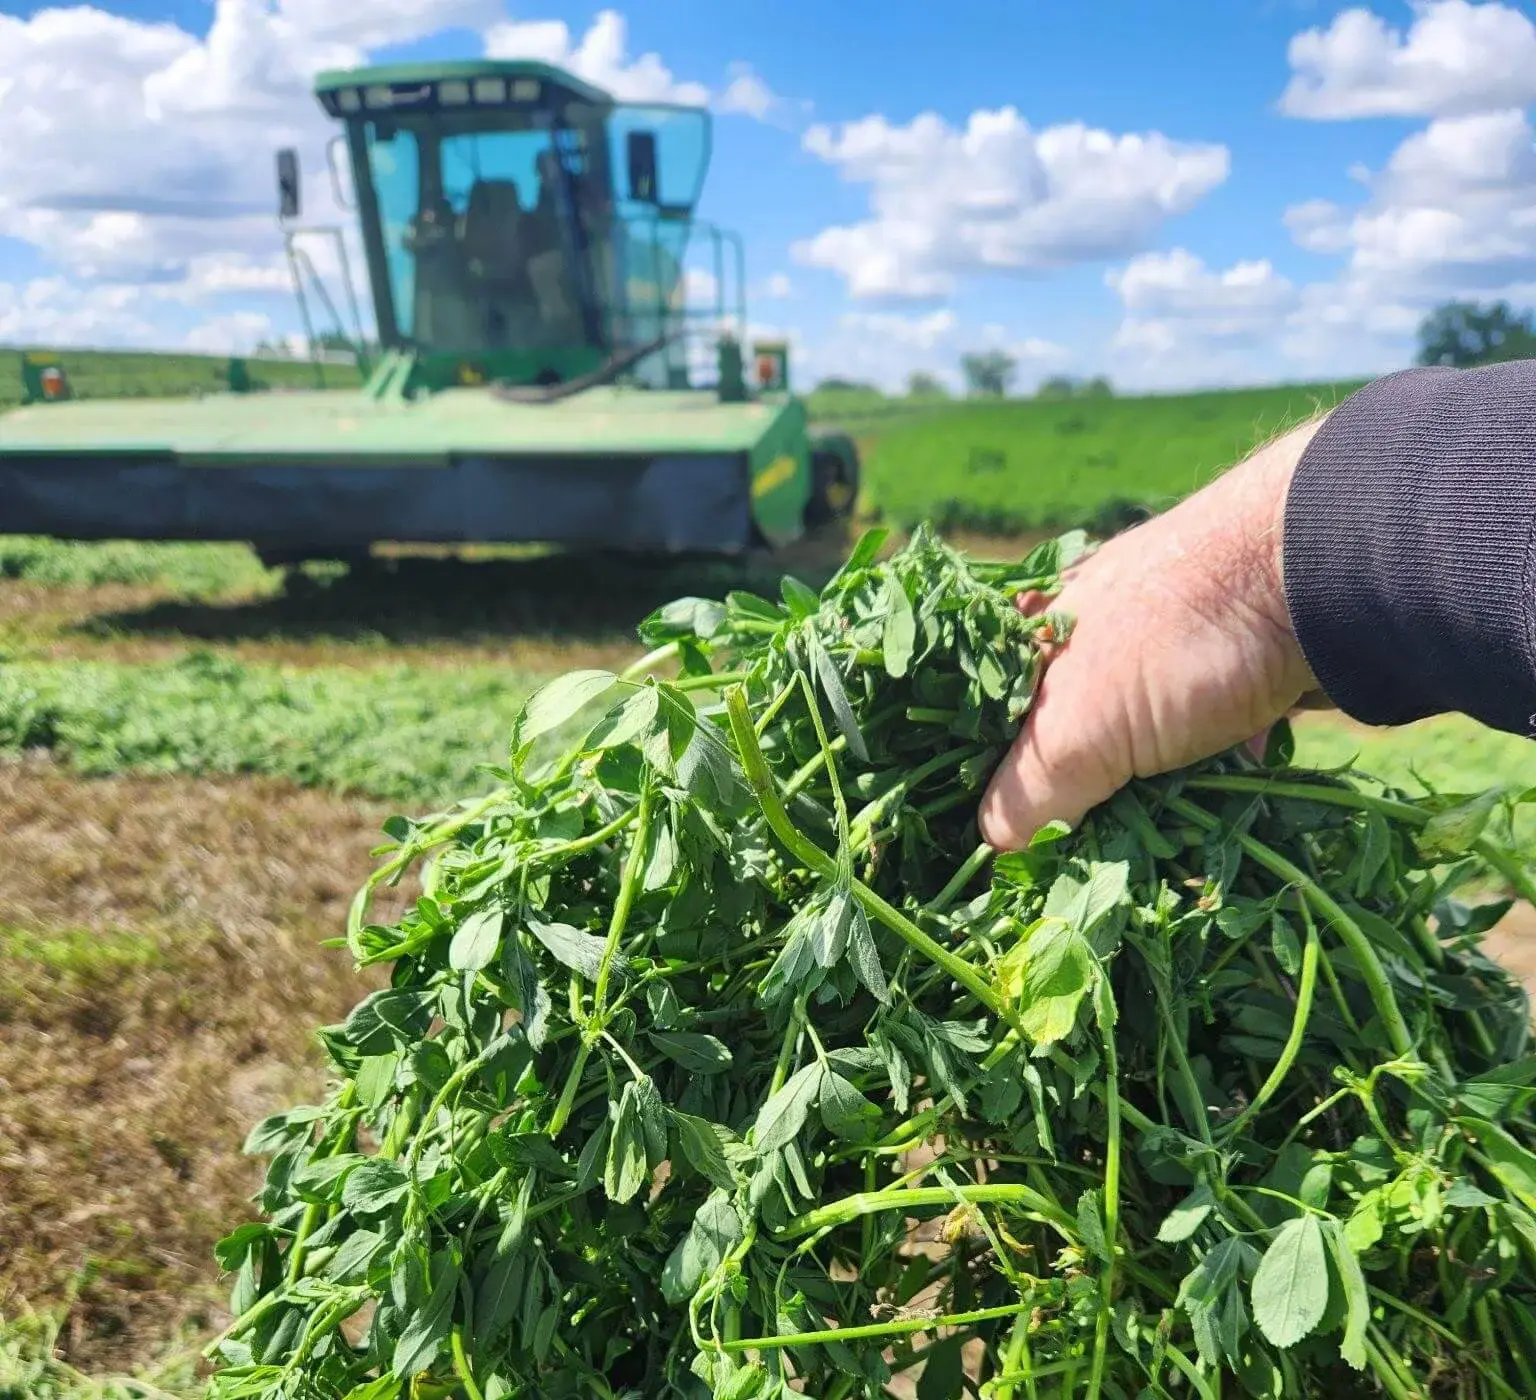
Hay conditioning rollers are a critical part of your mower-conditioner system. Their job is simple but essential: crimp or crack plant stems to allow moisture to escape more quickly. This process speeds up drying time and helps you get hay off the field faster, especially important when weather windows are tight.

Properly functioning hay conditioning rollers directly impact:

  • Drying speed, helping reduce the risk of rain damage
  • Nutrient retention, especially in delicate crops like alfalfa
  • Baling efficiency, allowing for more consistent moisture levels

Whether you’re running rubber or steel rollers, the goal is the same, consistent, effective conditioning without damaging the crop. That balance starts with proper setup and adjustment.

Why Spring Conditions Change Everything

Spring weather is unpredictable, and 2026 is no exception. One week might bring heavy moisture and cool temperatures, while the next swings toward dry, warm conditions. These rapid changes mean your roller settings can’t stay static.

Key variables include:

  • Moisture levels in the crop
  • Soil and field conditions
  • Temperature and humidity shifts

Relying on a single “default” setting for your hay conditioning rollers is a common mistake. Instead, successful operators adjust their setup based on what’s happening in the field that day, not what worked last season.

How Moisture Levels Affect Roller Settings

How Moisture Levels Affect Roller Settings

High Moisture Conditions (Wet Fields or Heavy Dew)

When crops are holding a lot of moisture, it’s tempting to increase pressure to speed up drying. But too much pressure in wet conditions can actually do more harm than good.

Risks include:

  • Over-conditioning the crop
  • Leaf loss, especially in legumes
  • Plugging or uneven feeding

Recommended adjustments:

  • Reduce roller pressure
  • Widen the roller gap slightly
  • Focus on consistent, not aggressive, conditioning

The goal is to open the stems without crushing the plant.

Low Moisture Conditions (Dry Weather)

In drier conditions, the opposite problem occurs. If rollers aren’t set aggressively enough, stems may remain intact, slowing down the drying process.

Risks include:

  • Under-conditioning
  • Longer drying times
  • Increased exposure to weather risk

Recommended adjustments:

  • Increase roller pressure
  • Tighten the roller gap
  • Ensure full stem contact across the width

Proper adjustment in dry conditions helps you take full advantage of faster curing weather.

Adjusting for Different Crop Types

Not all hay crops respond the same way to conditioning. Understanding the crop you’re working with is key to dialing in your hay conditioning rollers.

Alfalfa

Alfalfa

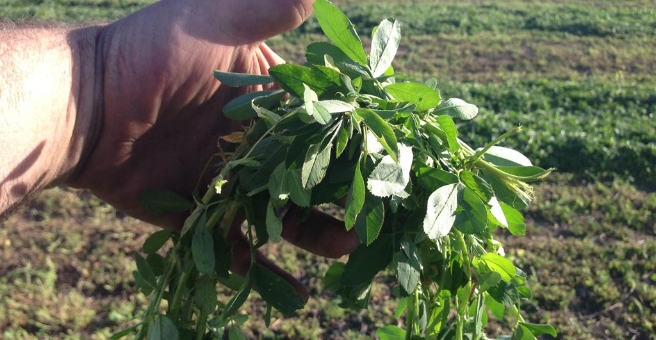
Alfalfa is valuable but delicate. Its leaves contain most of the nutrients, and excessive pressure can cause significant leaf loss.

Best approach:

  • Check for leaf retention behind the machine
  • Check to make sure stem has a good full crush and is cracked from top to bottom along the stem
  • Make sure leaves are not too bruised
  • Ensure that the top of the plant is not fully detatched

Grass Hay

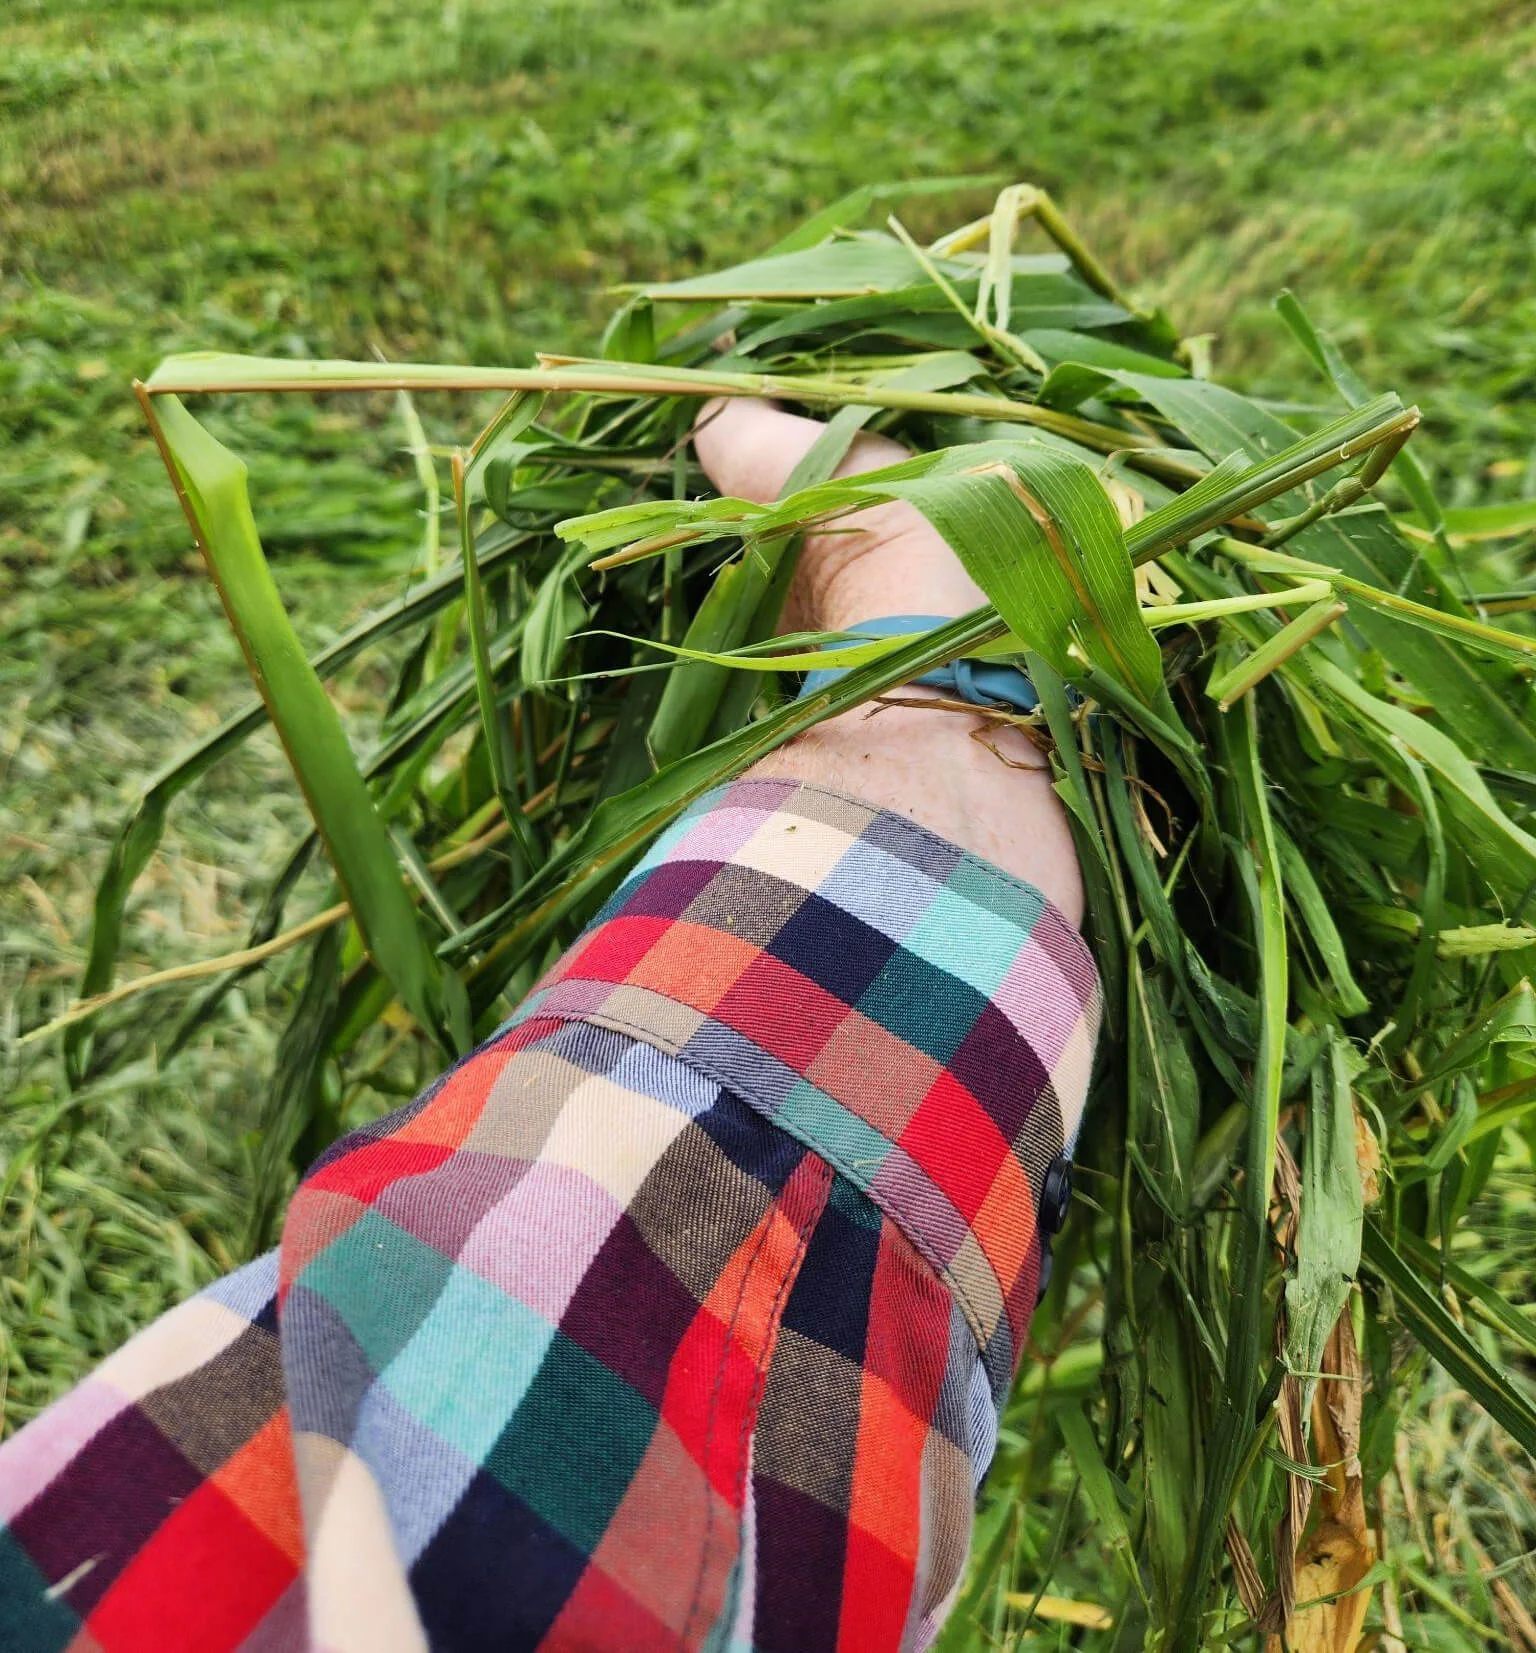
Grass crops typically have tougher stems and can handle more aggressive conditioning.

Best approach:

  • Increase roller pressure if stems are not fully crushed and nodes are not broken open
  • Ensure stems are properly cracked from top to bottom
  • Monitor for consistent conditioning across windrows
  • Grab a full handful out of your windrow and make sure it lays limp across your hand

Mixed Crops

Mixed stands require a balanced approach. You’ll need to adjust based on the dominant crop while minimizing damage to more delicate plants.

Best approach:

  • Start with moderate pressure
  • Adjust after a test pass
  • Evaluate both stem conditioning and leaf retention
  • Very similar to the same adjustment as alfalfa

Field Conditions and Their Impact on Roller Performance

Uneven or Rough Terrain

Bumpy fields can lead to inconsistent roller contact, which results in uneven conditioning.

What to do:

  • Avoid overly aggressive settings
  • Check for even pressure across rollers
  • Slow down if necessary to maintain consistency

Muddy or Soft Fields

Wet soil conditions can cause feeding issues.

What to do:

  • Keep rollers clean and free of buildup
  • Avoid excessive pressure that can worsen plugging
  • Monitor machine performance closely
  • After cutting a few rows, make sure your header is lifted up and run it to clear the mud from your rollers before cutting your next row

Thick vs. Thin Windrows

Crop density also affects how your rollers should be set.

  • Thin windrows may require slightly more pressure
  • Thick windrows might need a lighter setting to avoid over-conditioning

Matching your roller setup to crop density ensures uniform results.

Key Signs Your Roller Settings Are Off

Even experienced operators can miss early warning signs. Watch for these indicators that your hay conditioning rollers need adjustment:

  • Hay is drying slower than expected
  • Excessive leaf loss behind the machine
  • Uneven conditioning across the swath
  • Increased fuel consumption or machine strain
  • Look for uneven wear on your rollers from one end to the other that will cause uneven pressure

Catching these issues early can save both time and crop quality.

Step-by-Step Guide to Setting Hay Conditioning Rollers

Getting your setup right doesn’t have to be complicated. Follow these steps before and during your first cut:

  1. Inspect your rollers for wear, cracks, or uneven surfaces
  2. Clean off debris to ensure proper contact
  3. Check manufacturer guidelines for baseline settings
  4. Ensure there is no roller gap in your setting
  5. Set pressure according to current moisture conditions
  6. Run a short test pass in the field
  7. Evaluate results and make fine adjustments

This process only takes a few extra minutes but can significantly improve performance.

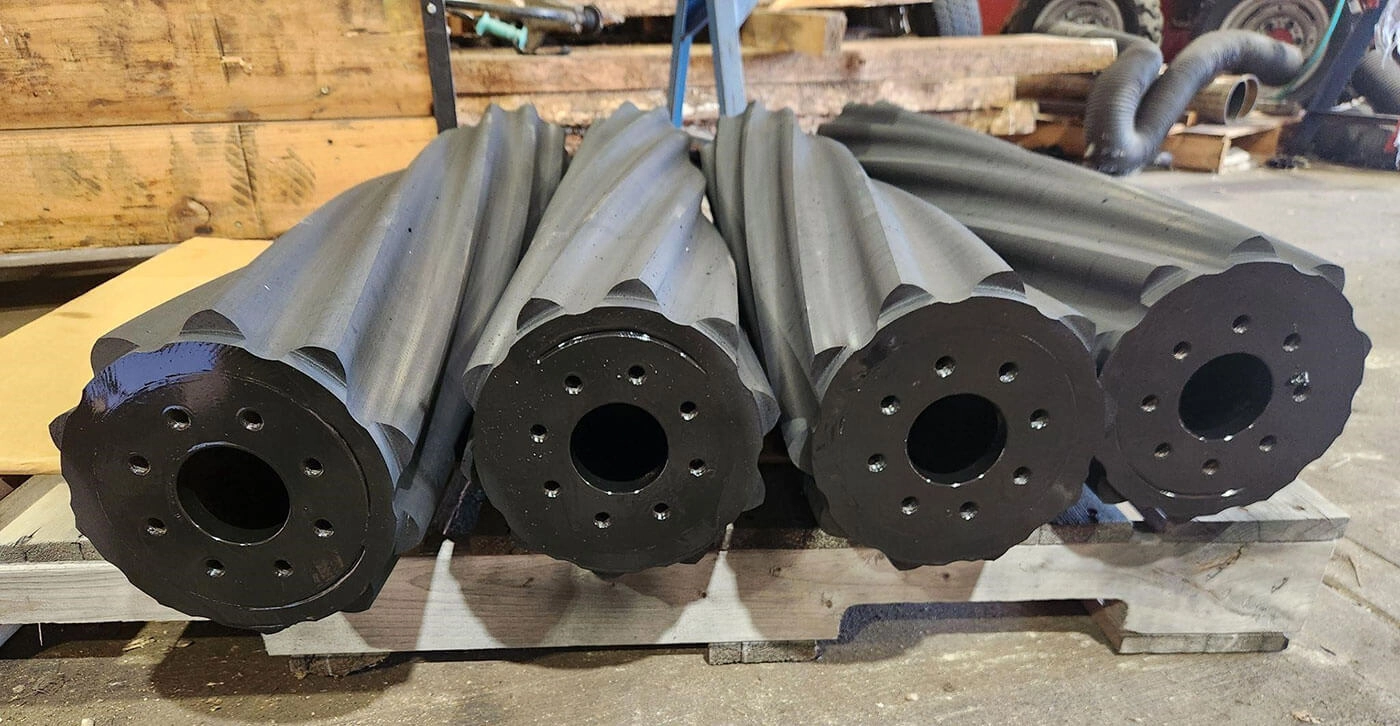
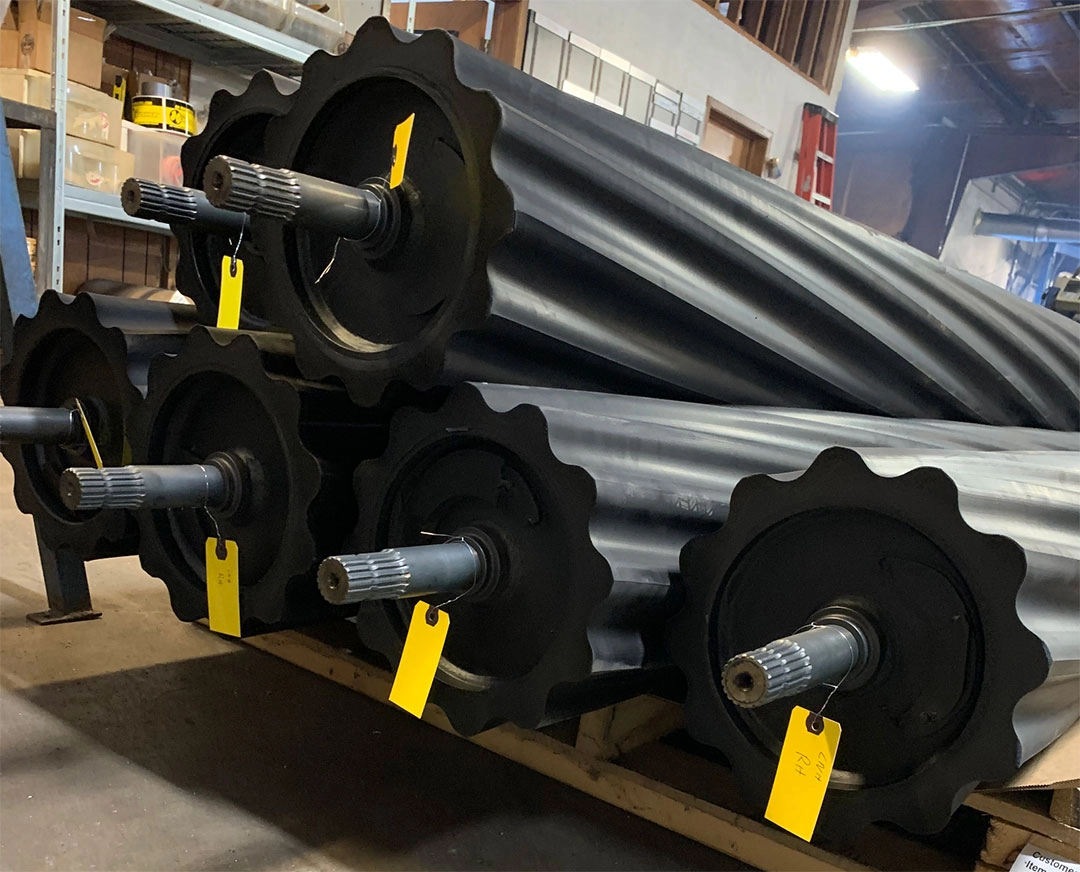
If your rollers aren’t holding consistent pressure or showing signs of wear, adjustments alone won’t fix the issue. Explore our full line of replacement rollers to restore performance and maintain consistent conditioning across every pass.

Common Mistakes to Avoid

Even small setup errors can have a big impact during the first cut.

  • Setting rollers too tight “just to be safe”. This could cause bearing and shaft failure
  • Ignoring differences between crops. Between your first and last cutting your stems will decrease in diameter and rollers should be adjusted accordingly
  • Failing to adjust settings as conditions change
  • Skipping pre-season inspections
  • Avoiding inspection of rollers for excessive wear

Avoiding these mistakes helps you get the most out of your equipment and your crop.

Why Roller Condition and Quality Matter

No matter how well you adjust your settings, worn or damaged rollers won’t perform properly. Over time, rollers lose their ability to apply consistent pressure and effectively crush stems.

This can lead to:

  • Slower drying times
  • Reduced forage quality
  • Increased fuel usage
  • More wear on your equipment
  • Loss of income

That’s why investing in high-quality replacements is critical. B&D Rollers specializes in durable, high-performance roller solutions designed to handle real field conditions. Having the right equipment makes all the difference when timing is tight.

Spring 2026 Pro Tips for Faster Drying

To maximize your results this season, keep these tips in mind:

  • Monitor weather forecasts daily and plan cutting windows carefully
  • Cut at the optimal time of day to reduce excess moisture
  • Pair proper roller settings with effective tedding and raking
  • Keep equipment clean, aligned, and properly maintained

Success during cutting isn’t just about one factor, it’s about how everything works together to obtain optimal forage conditioning.

Conclusion

Your first cut is an opportunity to set the pace for the entire hay season. Moisture levels, crop type, and field conditions all play a role in how your hay conditioning rollers should be set. Taking the time to adjust your equipment based on real conditions, not assumptions can lead to faster drying, better forage quality, and fewer headaches down the line.

If your rollers are worn, improperly set, or just not delivering the performance you need, now is the time to act. B&D Rollers offers reliable, high-quality solutions built for the demands of modern farming. Don’t wait until problems show up in your windrows, contact us today to ensure your equipment is ready for Spring 2026 and beyond.

You Might Also Like...

First Cut Prep: How Hay Conditions Impact Roller Settings (Spring 2026 Guide)

April 26, 2026

First Cut Prep: How Hay Conditions Impact Roller Settings (Spring 2026 Guide)

read more
Spring Startup Checklist: Essential Roller Prep Before First Cut

March 19, 2026

Spring Startup Checklist: Essential Roller Prep Before First Cut

read more
The Cost of Delaying Roller Maintenance and Parts Availability

February 15, 2026

The Cost of Delaying Roller Maintenance and Parts Availability

read more
How Early Season Prep Saves You Money All Year

January 22, 2026

How Early Season Prep Saves You Money All Year

read more
Why Year-End and Early-Year Roller Replacement Sets You Up for a Strong Season

December 19, 2025

Why Year-End and Early-Year Roller Replacement Sets You Up for a Strong Season

read more
Winterizing Your Farm Equipment: Why Rollers Need Special Attention

November 18, 2025

Winterizing Your Farm Equipment: Why Rollers Need Special Attention

read more
Stop Pushing It Off: Why Fall Is the Best Time for Roller Maintenance

October 22, 2025

Stop Pushing It Off: Why Fall Is the Best Time for Roller Maintenance

read more
How Dealerships Can Increase Profits by Selling Premium Rollers

September 15, 2025

How Dealerships Can Increase Profits by Selling Premium Rollers

read more
Worldwide Icon

AVAILABLE WORLDWIDE

USA, Canada, Mexico, Australia

No matter where you are, there’s a Crusher near you.

FIND A DEALER
Hay processed with The Crusher
scroll-top